As the world becomes increasingly conscious of the need for sustainable and renewable energy sources, solar power has emerged as a game-changer. Harnessing the abundant energy of the sun, solar panels offer a clean and cost-effective solution for residential and commercial energy needs. If you’re considering making the switch to solar, this step-by-step guide will provide you with the essential information you need to navigate the solar panel installation process.
Your Easy Guide to Installing Solar Panels
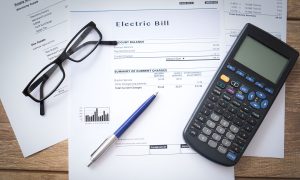
Step 1: Assess Your Energy Needs and Site Evaluation
Before embarking on your solar journey, it’s crucial to determine your energy consumption and evaluate the suitability of your site for solar panel installation. Analyze your utility bills to understand your energy usage patterns and calculate the required system size. Additionally, assess factors like roof orientation, shading from nearby trees or buildings, and local weather conditions to ensure optimal solar panel performance.
Step 2: Obtain Necessary Permits and Approvals
Solar panel installation often requires permits and approvals from local authorities. Research the specific requirements in your area, as regulations can vary depending on your location. This step is essential to ensure compliance with building codes and zoning laws, and to avoid potential legal issues or fines.

Step 3: Choose the Right Solar Panel System
There are various types of solar panel systems available, each with its own advantages and considerations. Monocrystalline and polycrystalline panels are the most common options, offering different levels of efficiency, cost, and durability. Additionally, you’ll need to decide between grid-tied and off-grid systems, depending on your energy needs and preferences.
Step 4: Select a Reputable Solar Installer
Working with a reputable and licensed solar installer is crucial for a successful solar panel installation. Research and compare multiple installers, considering factors such as experience, warranties, customer reviews, and pricing. A skilled installer will ensure proper system design, seamless installation, and compliance with all relevant codes and regulations.
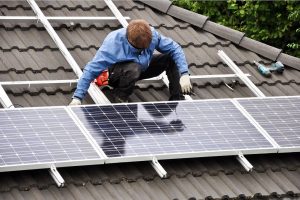
Step 5: Installation and Interconnection
Once you’ve selected your solar panel system and installer, the installation process can begin. This typically involves mounting the solar panels on your roof or ground-mounted structures, installing the inverter and other electrical components, and connecting the system to your home’s electrical system or the utility grid (for grid-tied systems).

Step 6: Inspection and Activation
After the installation is complete, your local authority or utility company will likely require an inspection to ensure the system meets all safety and code requirements. Once the inspection is passed, your solar panel system can be activated, allowing you to start generating clean, renewable energy from the sun.
Step 7: Maintenance and Monitoring
Solar panel systems are designed to be low-maintenance, but regular cleaning and monitoring are still essential to ensure optimal performance. Establish a maintenance schedule for cleaning the panels, checking for any damage or debris, and monitoring the system’s output. Many solar installers offer monitoring services or apps to help you track your system’s performance and energy production.
By following these steps, you’ll be well on your way to unlocking the power of the sun and enjoying the numerous benefits of solar energy. From reducing your carbon footprint and energy costs to increasing your property value, solar panel installation is an investment in a sustainable future. Embrace this renewable energy source and join the growing community of environmentally conscious individuals making a positive impact on our planet.